

Hello, and welcome back to a new article on how to paint a Sea People Warrior!
This isn't technically a 'Part 2', but it does follow on from my previous article on how to paint a Sea People Warrior - Basecoats in 10 minutes. This time I'll be showing you how to add highlights to the basecoats that were applied last time.
The idea of these two articles is to show both newcomers to the hobby, and veteran gamers who struggle with painting their miniatures, how quick and easy it can be to get painted units on to your battlefield. With a little patience, anyone can learn how to quickly paint a 'tabletop standard' army by using the techniques outlined in the first article, and with a little extra time, produce an even more impressive host that you will happily game with for many years!
Remember - just getting basecoats on your miniatures is a good initial target, and one that many gamers fail to achieve, so if you've already got to that stage - well done! Now, if you want to add just that little bit of extra detail, this new article will be a very useful tool for you.
If you haven't already read the previous article, please do! It contains some useful tips and tricks for painting any miniature, quickly!
Remember - No speed-paints, no washes. All acrylics!
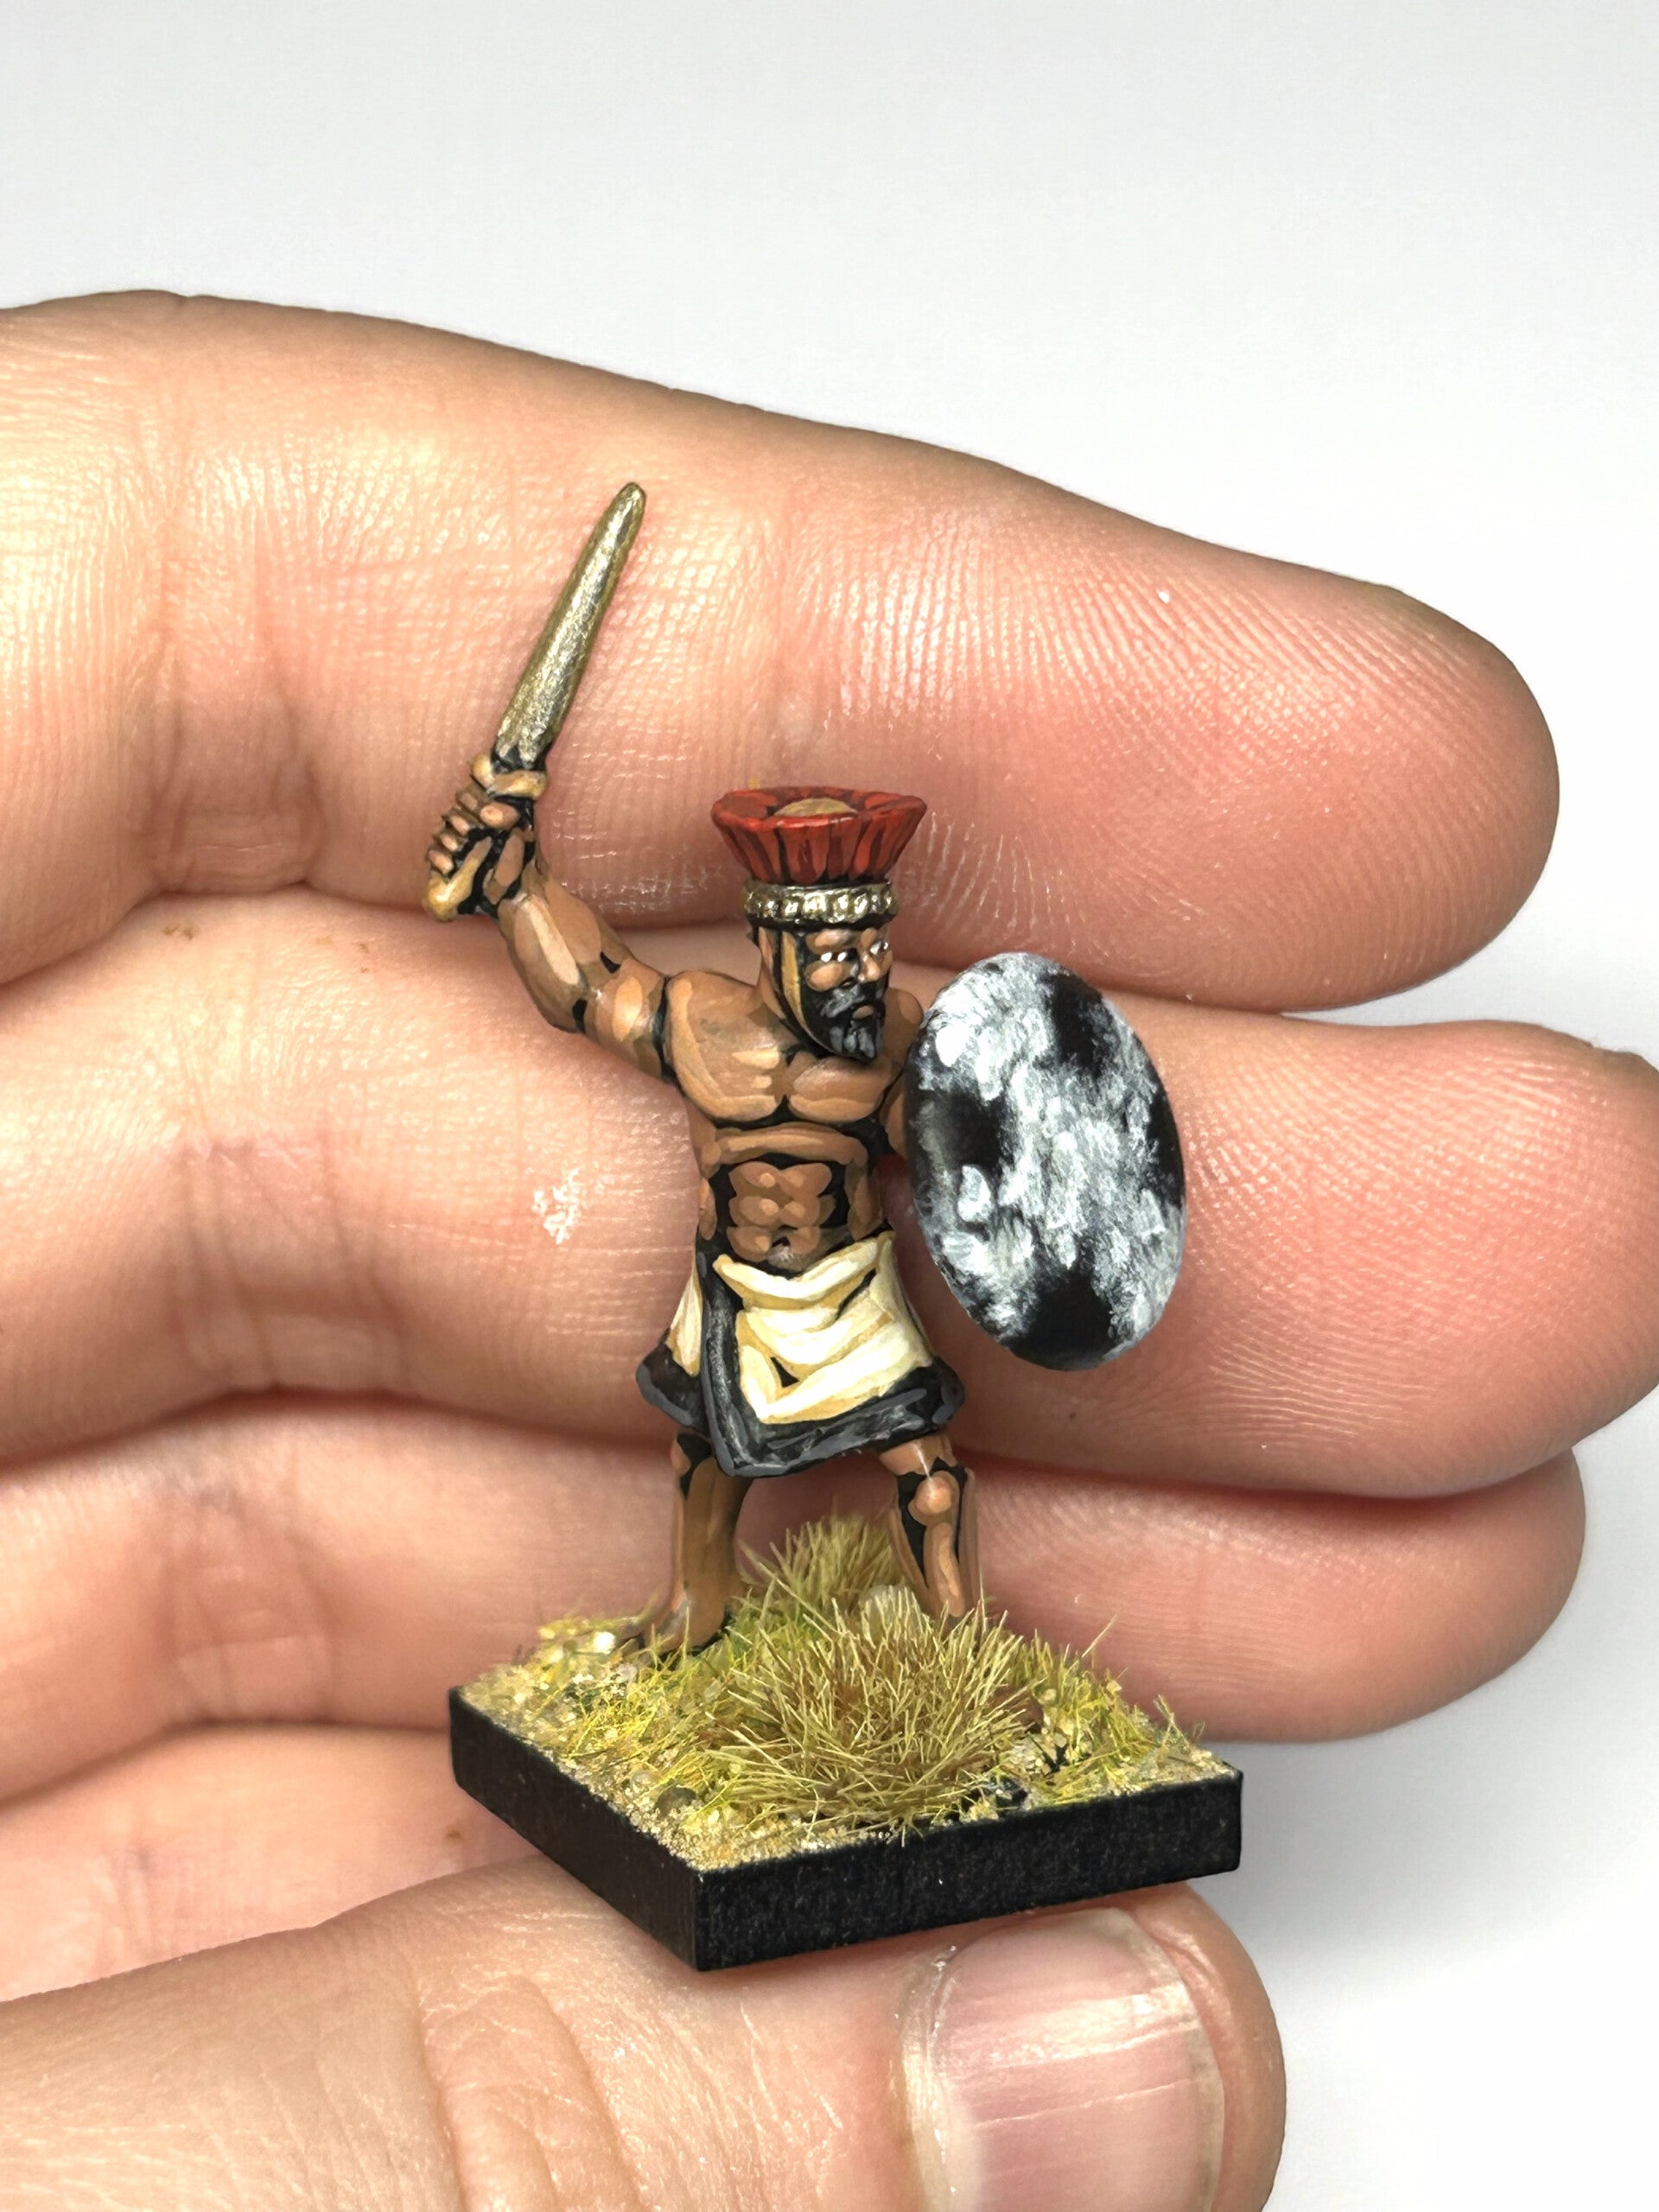
The end result!
Even though this step by step is focused on painting a Sea People Warrior, the ideas and processes used when painting a miniature in this way are applicable to any period or miniature.
I will be making more hobby articles in both written and video form, which will be similar to this, in the near future, and will cover various periods.
Now, lets begin!
Step 1: Preparation
For this article, these are the colours that I've used:
Clothing and Beard - Black (B) - Wargames Foundry
Skin - North African Flesh (B + C) - Wargames Foundry
Skirt - Boneyard (B + C) - Wargames Foundry
Helmet - Dark Vermillion - Vallejo
Helmet and Sword straps - Spearshaft (C) - Wargames Foundry
Metal - Bronze Barrel (C) - Wargames Foundry
Shield and eyes - Arctic Grey (C) - Wargames Foundry
If you don't have these exact colours, anything similar will work just fine, so grab your brushes and let's get painting!
QUICK TIP
When using acrylic paints, make sure not to get your bristles completely covered in paint. This is an example of how much paint I would add to a brush to start painting a mini. You can see the consistency isn't overly thick or thin. This does take a little practice to get right, and may also depend on what you're painting, but by painting more minis, you'll get better each time!

Below you can also see how much paint is on my brush when applying highlights to smaller areas. Again, you generally don't want the paint to be overly thick or thin. The downside to having this much paint on the brush is that it tends to run out quickly! Make sure to keep your brush as clean as possible and re apply paint in small amounts as often as required!

Step 2: The Skin


Just as in the previous article, I start with the skin!
As this is the first highlight colour, I leave quite a lot of the basecoat that was initially applied. I use North African Flesh (B) straight out of the bottle, as it already has a nice consistency.
I usually start with the face and then work my way down the miniature. You can see in the photo that I'm using the sword and back of the helmet as a secure point to hold the miniature, as I paint the flesh. This is to keep the mini steady, although it might not always be something you have to do.
My aim with this colour is to start defining the muscles, as well as the facial features. You can get away with highlighting a little too much at this stage, as we still have one more layer of highlighting to apply before it's finished.
As we used a black undercoat to paint this miniature, you can see how much of the base coat is left visible at this stage to represent shaded areas of the miniature. A rule of thumb for highlighting is to leave a little colour painted in the previous stage to simulate that increase in contrast between the colours, and this is what you want to do with this colour. Click on the images to see exactly how much of the first colour I left untouched.


Once the first colour has completely dried, we can move on to the final highlight colour on the skin.
With this step, only paint to the most raised areas of the skin, to emphasize the features of the face and muscles.
When highlighting, use colours that are quite bright. Once the miniatures are all together and in a unit, they will look even more impressive on the tabletop!
I usually focus on the face and hands when highlighting skin, but as the flesh constitutes most of the miniature on a Sea Peoples Warrior, I've taken the time to emphasize his abdominal and chest muscles too. Take your time with this stage and make sure you only have a small amount of paint on the brush when applying it.
And that's the skin done - congratulations! You've completed the hardest and longest part of painting most miniatures!
Step 3: The Skirt


I like using off-whites where possible on my miniatures as they look good on the tabletop, and are much easier to paint than a pure white.
Using the same idea as before when placing highlights, I use Boneyard (B) straight out of the bottle, and now I have to be a bit more careful to try not to touch any of the skin that's just been completed!
You can see that I've left the initial base colour in a few places, to simulate shadow in the darker parts of the skirt. I've also started to follow the creases that the sculpt has when highlighting, as that creates the natural look of folds.


Once that paint has finished drying, we can apply the next highlight.
One of the best parts about highlighting a second time around is that it can be pretty quick, but it will really make your miniature stand out!
Step 4: The Helmet


With the largest parts of the model now highlighted, we can work on some of the smaller areas. lets begin with the helmet.
Because the following parts are much smaller, you can highlight using only one colour, and still get a great finish!
I use Dark Vermillion and thin it slightly using water. Remember that the consistency of your paint should be something similar to milk. Thin enough to apply to your miniature, but thick enough that the pigment is a solid colour when applied.
With the thinned down red, I carefully paint thin lines to represent the individual strands on the helmet. When applying a new line, I leave a little of the base colour between the previous and next line, repeating until I've gone all the way round the helmet. Don't forget to paint the top as well!
Step 5: The Brown


We're now getting into a bit more detail with our painting, but are almost finished, so remember to take your time and be as neat as possible! Don't worry if you get paint on a part you've already done, just wait for any slips to fully dry, then go over again with the correct colour.
I'm only using one colour to highlight all of the brown areas on this miniature. A single, brighter highlight on these small parts can accentuate them, but I always try to not go overboard as they aren't the main focus of the miniature.
Don't forget to highlight the top of the helmet too!
Step 6: Black


OK, we're nearly done as there are only a couple more areas to finish off now!
Black is a great colour to use on your miniatures where possible, as it works well with pretty much every colour you might want to pair it with.
One of the common mistakes made when highlighting black, is to use a grey that is too light!. The trick here is to highlight even less than you would normally, or even leave it black!
In this instance, I've painted the trim of the skirt and beard a very dark grey, and left the shield black. You can definitely tell the black has been highlighted when you look at the miniature closely, but if you want to speed up the whole process you can usually get away with not highlighting at all, although this usually only works on small areas of the miniature. If you have an entirely black uniform or piece of equipment, you should probably highlight it at least once!
Step 7: The Metal


This part is pretty quick, but be careful. When painting the sword you want to paint the 'sharpest' edges. You can do this by using the edge of the bristles of your brush and dragging it across the surface of both sides of the blade.
I didn't highlight the helmet. The reason is, well, it's pretty hard to see when the miniature is on the battlefield. You can skip the highlight on certain parts of the miniature if its hard to get to, or if that part won't be seen when on a tabletop.
You can go even lighter with the highlights if you wish, and I sometimes use silver to do a final highlight when painting any bronze areas, which will really make those areas stand out.
In any case, make sure this step is fully dry before moving onto the next step. Metallic paints tend to rub off easily if not completely dry.
Step 8: Painting the Eyes and Shield


In this step, I used pure white.
To begin with, the shield has been highlighted using a well used brush, but one that I can still dab the paint in specific areas, to get a nice textured effect. I want to leave a lot of the initial grey base coat I applied, but still have enough white on the shield to create some different colour variation on the shield.

You can see where I have loaded the brush up with the white on the bristles (just over half way up) and then used some tissue paper to wipe 99% of the paint off. You want the brush to have enough paint on so that you can dab it on the shield and create this quick and easy cowhide effect. Test the brush, and either add or remove paint to get the desired effect.
If the brush is too wet use the paper towel to take more paint off, and then go straight back to the shield with the paint already on it and dab the brush. The trick is to not drag the brush, but dab with the tip only. You can be a bit heavy handed with this and still get some very nice effects.
Now, for the eyes, you can simply skip this step if you like, as very few gamers will be looking close enough to see the whites of your miniatures eyes!
Painting eyes is a stage that many people over complicate, but here's how I do it.
All you want to do is paint four dots, one either side of each eyeball. Simple right?
The first picture shows where I place the first dot on each eyeball. The second shows the second dot on each eyeball. You can see that I have left some black between the eyes to represent the pupil. I find this mush easier than painting a line of white then painting a black dot in the middle of the eye.
If you've never tried painting eyes this way before, it's well worth giving it a go! You want the white paint to not be dry on the brush, so thin it a little, but make sure it is only on the very tip of your brush, to give as much control as possible.
The finished product!


Well done! You've now finished a Sea People Warrior for On Bloody Ground - The New Kingdom
I did time the whole process myself, and as you can see, all the highlighting can also be completed in less than 10 minutes - just about! If you're entirely new to painting, or have never painted a warrior from the Bronze Age before, it may take a little longer, but with practice, you will undoubtedly be able to get a painted army on the table, and in much less time than expected.

Working on five or ten miniatures at once will allow you to create a kind of production line by painting the same stage on more than one miniature, before moving on to the next stage, and will certainly speed up the process too, so give that a try!
The trick is to paint a manageable amount of minis at any one time, and in the order or technique that suits you best. Some painters will paint one hand at a time on each mini, before moving onto the next, whereas others like to paint a whole unit of twenty or more in one go. Try a few different methods, and you will quickly find out what works best for you!
With some practice, and especially when painting a handful of miniatures at the same time, you could easily paint a miniature, just like this, in around 20 minutes - so why not make a start right now!
Tips to Remember
Throughout this article, I have marked in bold what I consider to be important things to remember when painting any miniature. If you keep these in mind when painting in the future, you will become a better painter, and may find things easier than you have done in the past.
Listed below are all of the tips I have suggested in this article in a shorter form that can be of use on any miniature you paint in the future:
- A rule of thumb for highlighting is to leave a little colour painted in the previous stage to simulate that increase in contrast between the colours
- When highlighting, use colours that are quite bright. Once the miniatures are all together and in a unit, they look amazing on the table!
- Highlighting a second time can be pretty quick, and it can really take your miniature to the next level
- Remember that the consistency of your paint wants to be something similar to milk. Thin enough to apply to your miniature, but thick enough so that the pigment is a solid colour when applied
- Don't worry if you get paint on a part you've already done, just wait for the colours to fully dry, then go over it with the correct colour
- Highlight even less than you normally would when painting black, or even leave it entirely
- You can skip the highlight on certain parts of the miniature if its hard to get you brush to paint that area, or if that part won't be seen when on a table
- Paint a manageable amount of minis at any one time, and in the order or technique that suits you best
If you have any tips for new painters, or secret knowledge that helps you get an army painted and on the table quickly, let us know!
Add comment
Comments